While I have several other units and models from outside the company itself - the one thing I needed to finish for the core company was the dreads. I've wanted to paint a blood angels dreadnought since they came as 2kg of pewter, with paper banners, goblin green bases, and you were expected to paint bright yellow flames down the side.

This will kind of bring my Blood Angels up to full company strength (according to the ~8th ed setup anyway); 100 marines in 60 tac, 20 dev, 20 assault, plus company command, librarian and 2 dreads. I'm counted the DC dread as well so... that will cover the old codex company concept.
I'm using two different kits - one of the Furioso bodies, plus a standard marine dreadnought. This will give me two slightly different looks, plus a mix of arms that can be mixed between them in several ways. These kits are pretty similar, but as always there are a couple of minor nuances. I'm starting with some internal adjustments - installing magnets in the shoulders, as well as a flat one inside the top of the body (which will allow launchers or equipment to be magnetised to the top. The furioso kit is just a bit narrower in that gap, so needs to be slightly drilled out to fit a magnet.
The arms themselves just have a metal washer superglued on. This is a lot easier than trying to drill and fit more magnets, and a packet of 50 washers is about the same cost as 2 magnets. Note that the nubs on the body are also slightly different diameters for the two kits - again, it's easier to just drill the holes in the arms from the furioso kit a little bigger. That will allow them to slide on and off either body easily.
For the claws I'm mimicking what I did a while back on my DC dread - the BA kit comes with two sets of 'wrists'; one for the regular claws and one for blood claws. To magnetise these, I slice the tip off the arm, pack the cavity with some blu tac, and then superglue a 6x3mm magnet inside. The tip then gets glued back on. This magnet is strong enough to hold the claw with a washer glued on, even without direct contact.
While finishing up assembly, I've also pulled out a finecast techmarine and servitor kit. I cannot understate how much I hate working with finecast. Every time I thought I had cleared all the shims and runnels, I'd find another bit tucked away. The servitors in particular have many little pieces that could be either waste or actual model, and I doubt I have cleaned them up perfectly.
And we're onto painting. Everything gets a vallejo red primer, followed by grey primer on the upper edges. I've seen a lot of examples of this done the other way around (airbrushing the lighter colour on the lower parts of panels), but I've wanted to try it this way.
I then come back through and more carefully apply some black to the opposite ends to create some shadow. Most of the areas can be done by just carefully holding the piece at the right angle for the airbrush - a couple of sides on the weapons needed some masking tape to help, where the angle on the panels was too shallow to avoid hitting other parts.
Everything then gets a light dusting of mephiston red air to bring out the colour, then a layer of gloss varnish to help with surface tension (and lock the colours in place).
At this point I left the dreads while finishing some other projects - came back a number of weeks later to start the brushwork. Metals are usually the first thing I do after airbrushing - it's one of the more fiddly and time consuming steps (which is why I often procrastinate at this point), and in this case also throwing some green on the eye slots so they don't need to be accessed later on.

With leadbelcher and gold on, the wings/bone areas get some colour too. The bone will get the same agrax wash as the gold, and the blue wash on the wings can dry at the same time.
I've then painted up the individual feathers with ulthuan grey and white scar. At this point I'm enjoying it - the chassis are starting to pop and look like the end product.
The servitors had been airbrushed with a basic black primer all over and grey from above. They are simple, secondary models that aren't getting much love in the painting area - skin is just a light sepia wash over the shaded primers, then lots of leadbelcher for metals, and templar black contrast for the overalls.
I'd kept the red shin pads separate during airbrushing so the leadbelcher legs could be accessed separately. The feet were a little more work - these were glued on before priming, and the whole base painted in grey. The feet needed about 3-4 light coats of khorne red and then mephiston to bring the colour up.
Since there will be some extra weight from magnets & stuff at the top, I've reinforced the legs by putting a pin through the leg, foot and base. The legs themselves were masked and done with plastic glue. The pin then has a little bit of superglue to help.
That basically finishes the 'permanent' parts of bodies/legs - then onto the arms which are all magnetised & swappable. A few of these are resin forgeworld arms that I've had tucked away for a while - a plasma cannon, multimelta & heavy bolter pair.
Back to detailing stage and lots of leadbelcher. As much as I complain about this step all the time, it does make a big jump in how finished/defined the parts are.
There is fun to be had in adding heat effects to some of these - druchii violet, drakenhof and sepia shades applied in careful little doses.
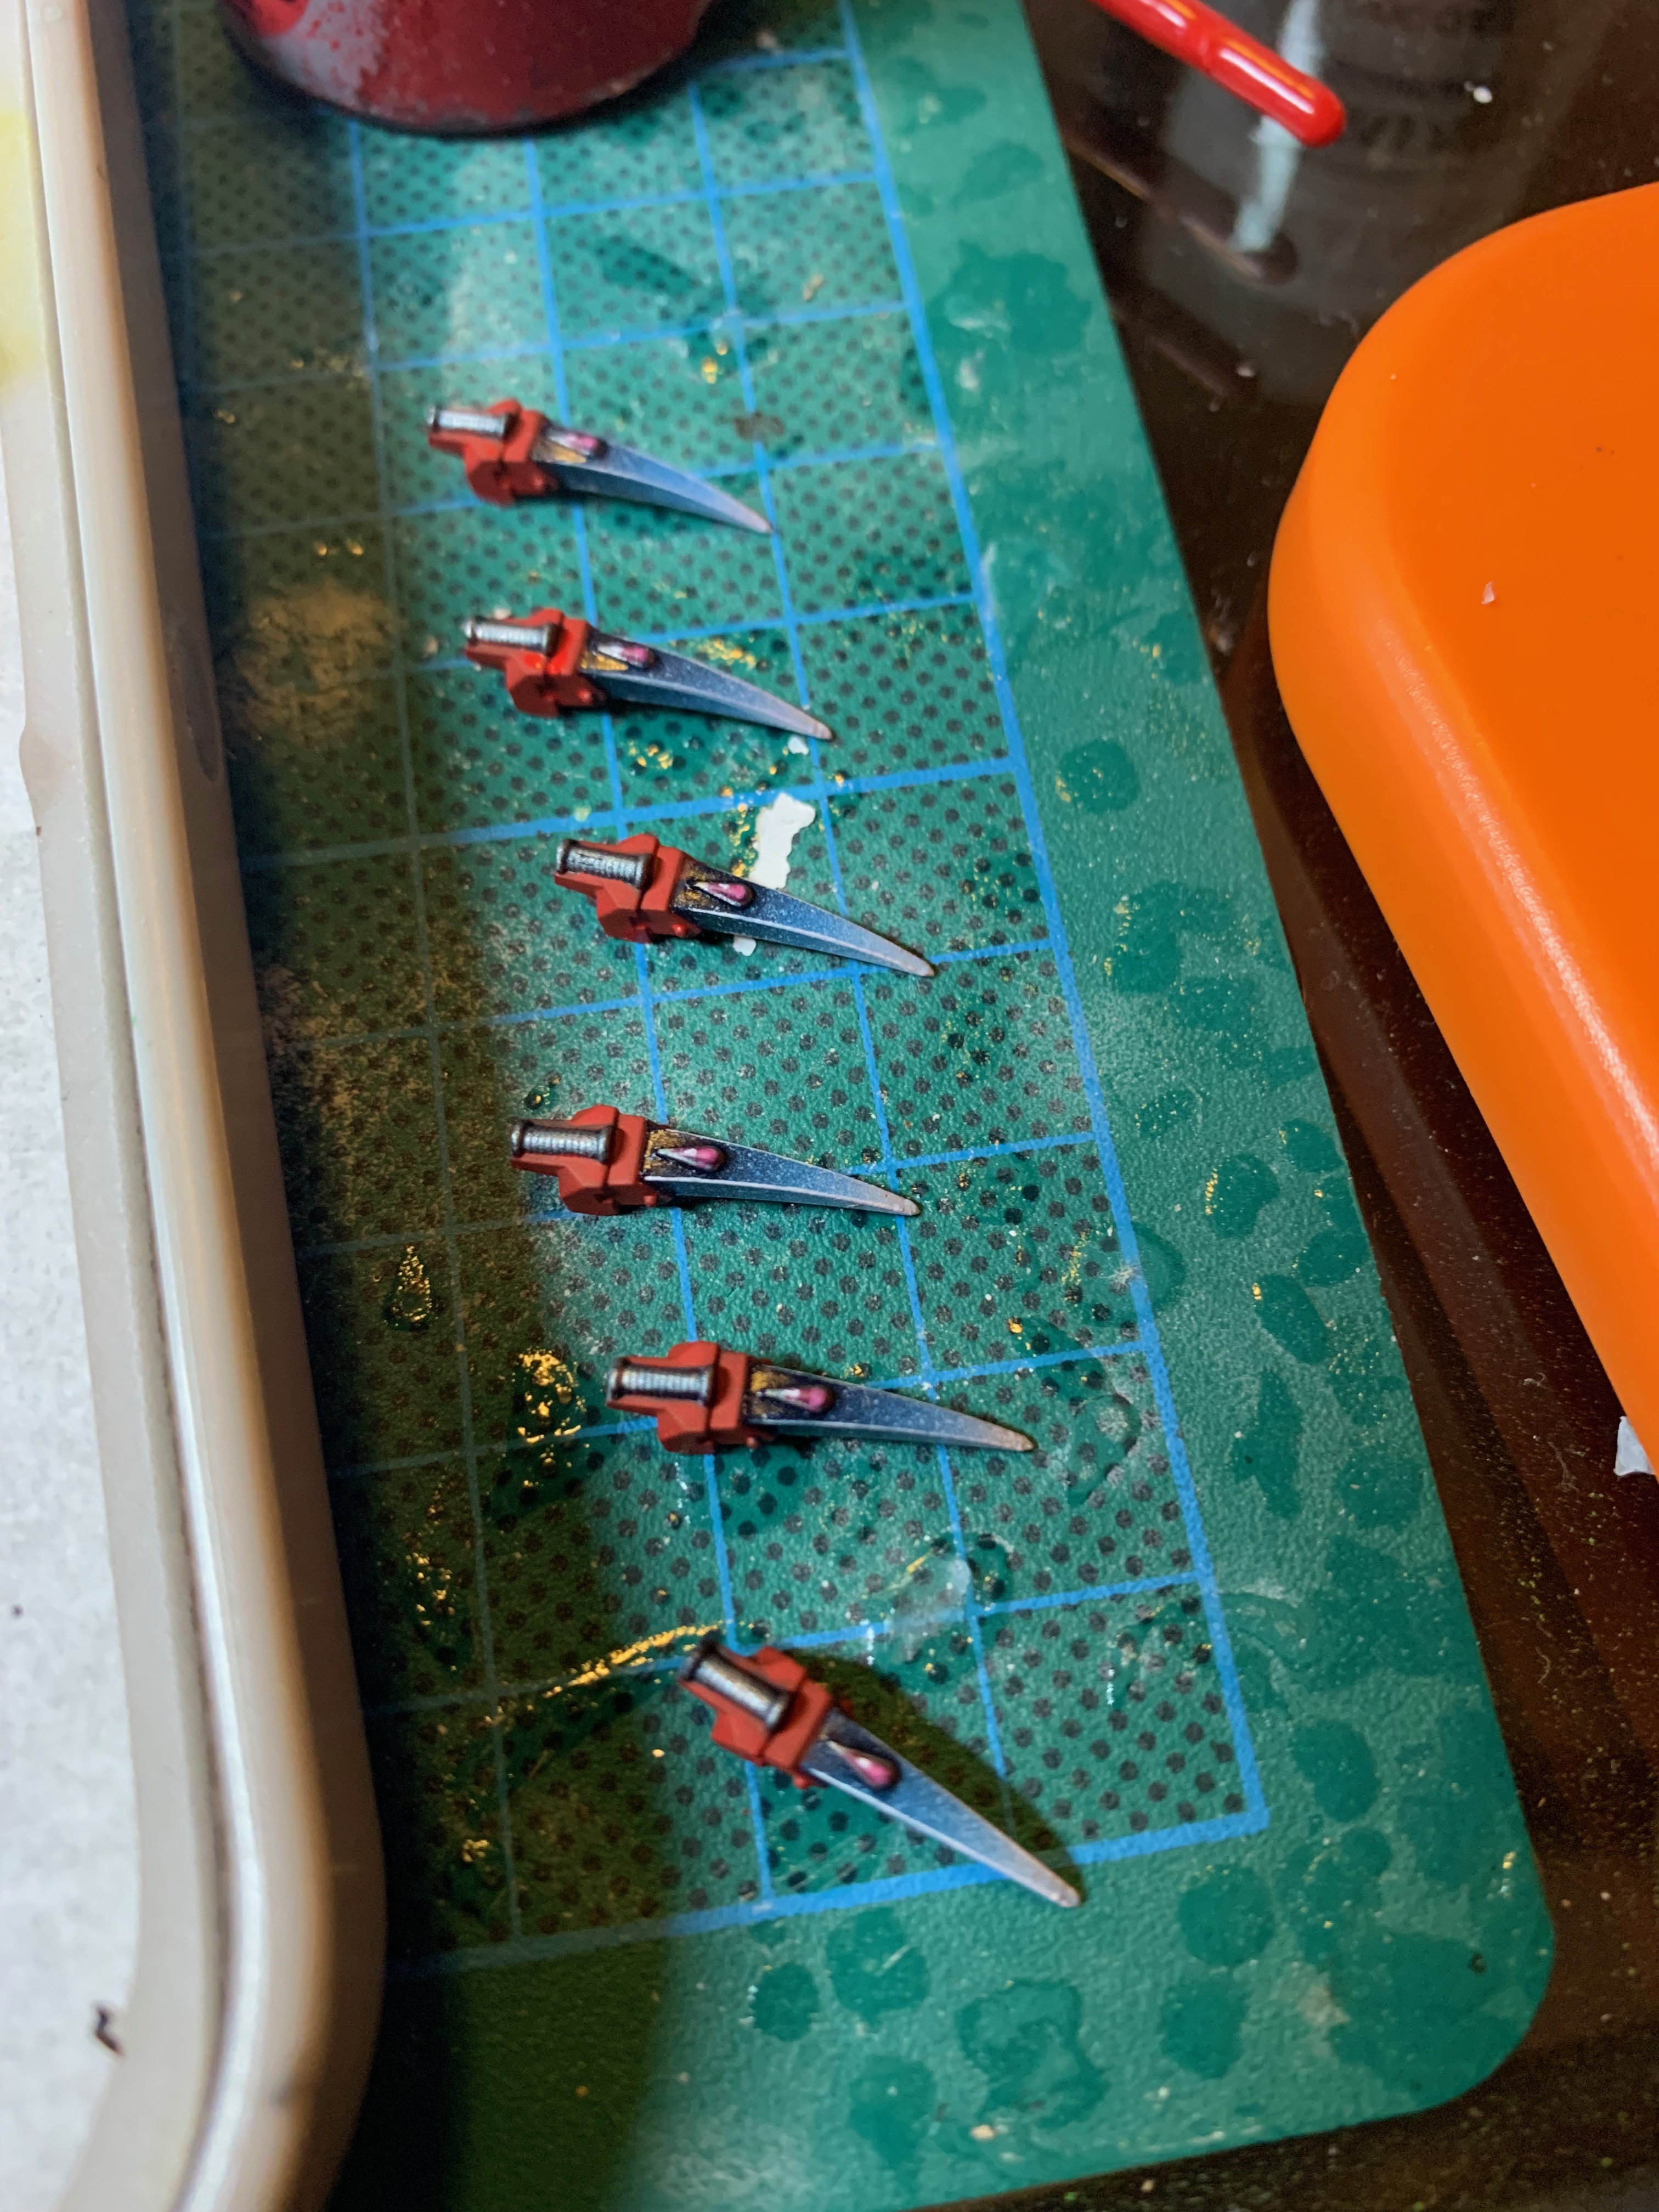
The blood claws were blued by airbrush - they have had a thin edge highlight of white, and then a few layers of mephiston red on the housing with usual highlight colours.
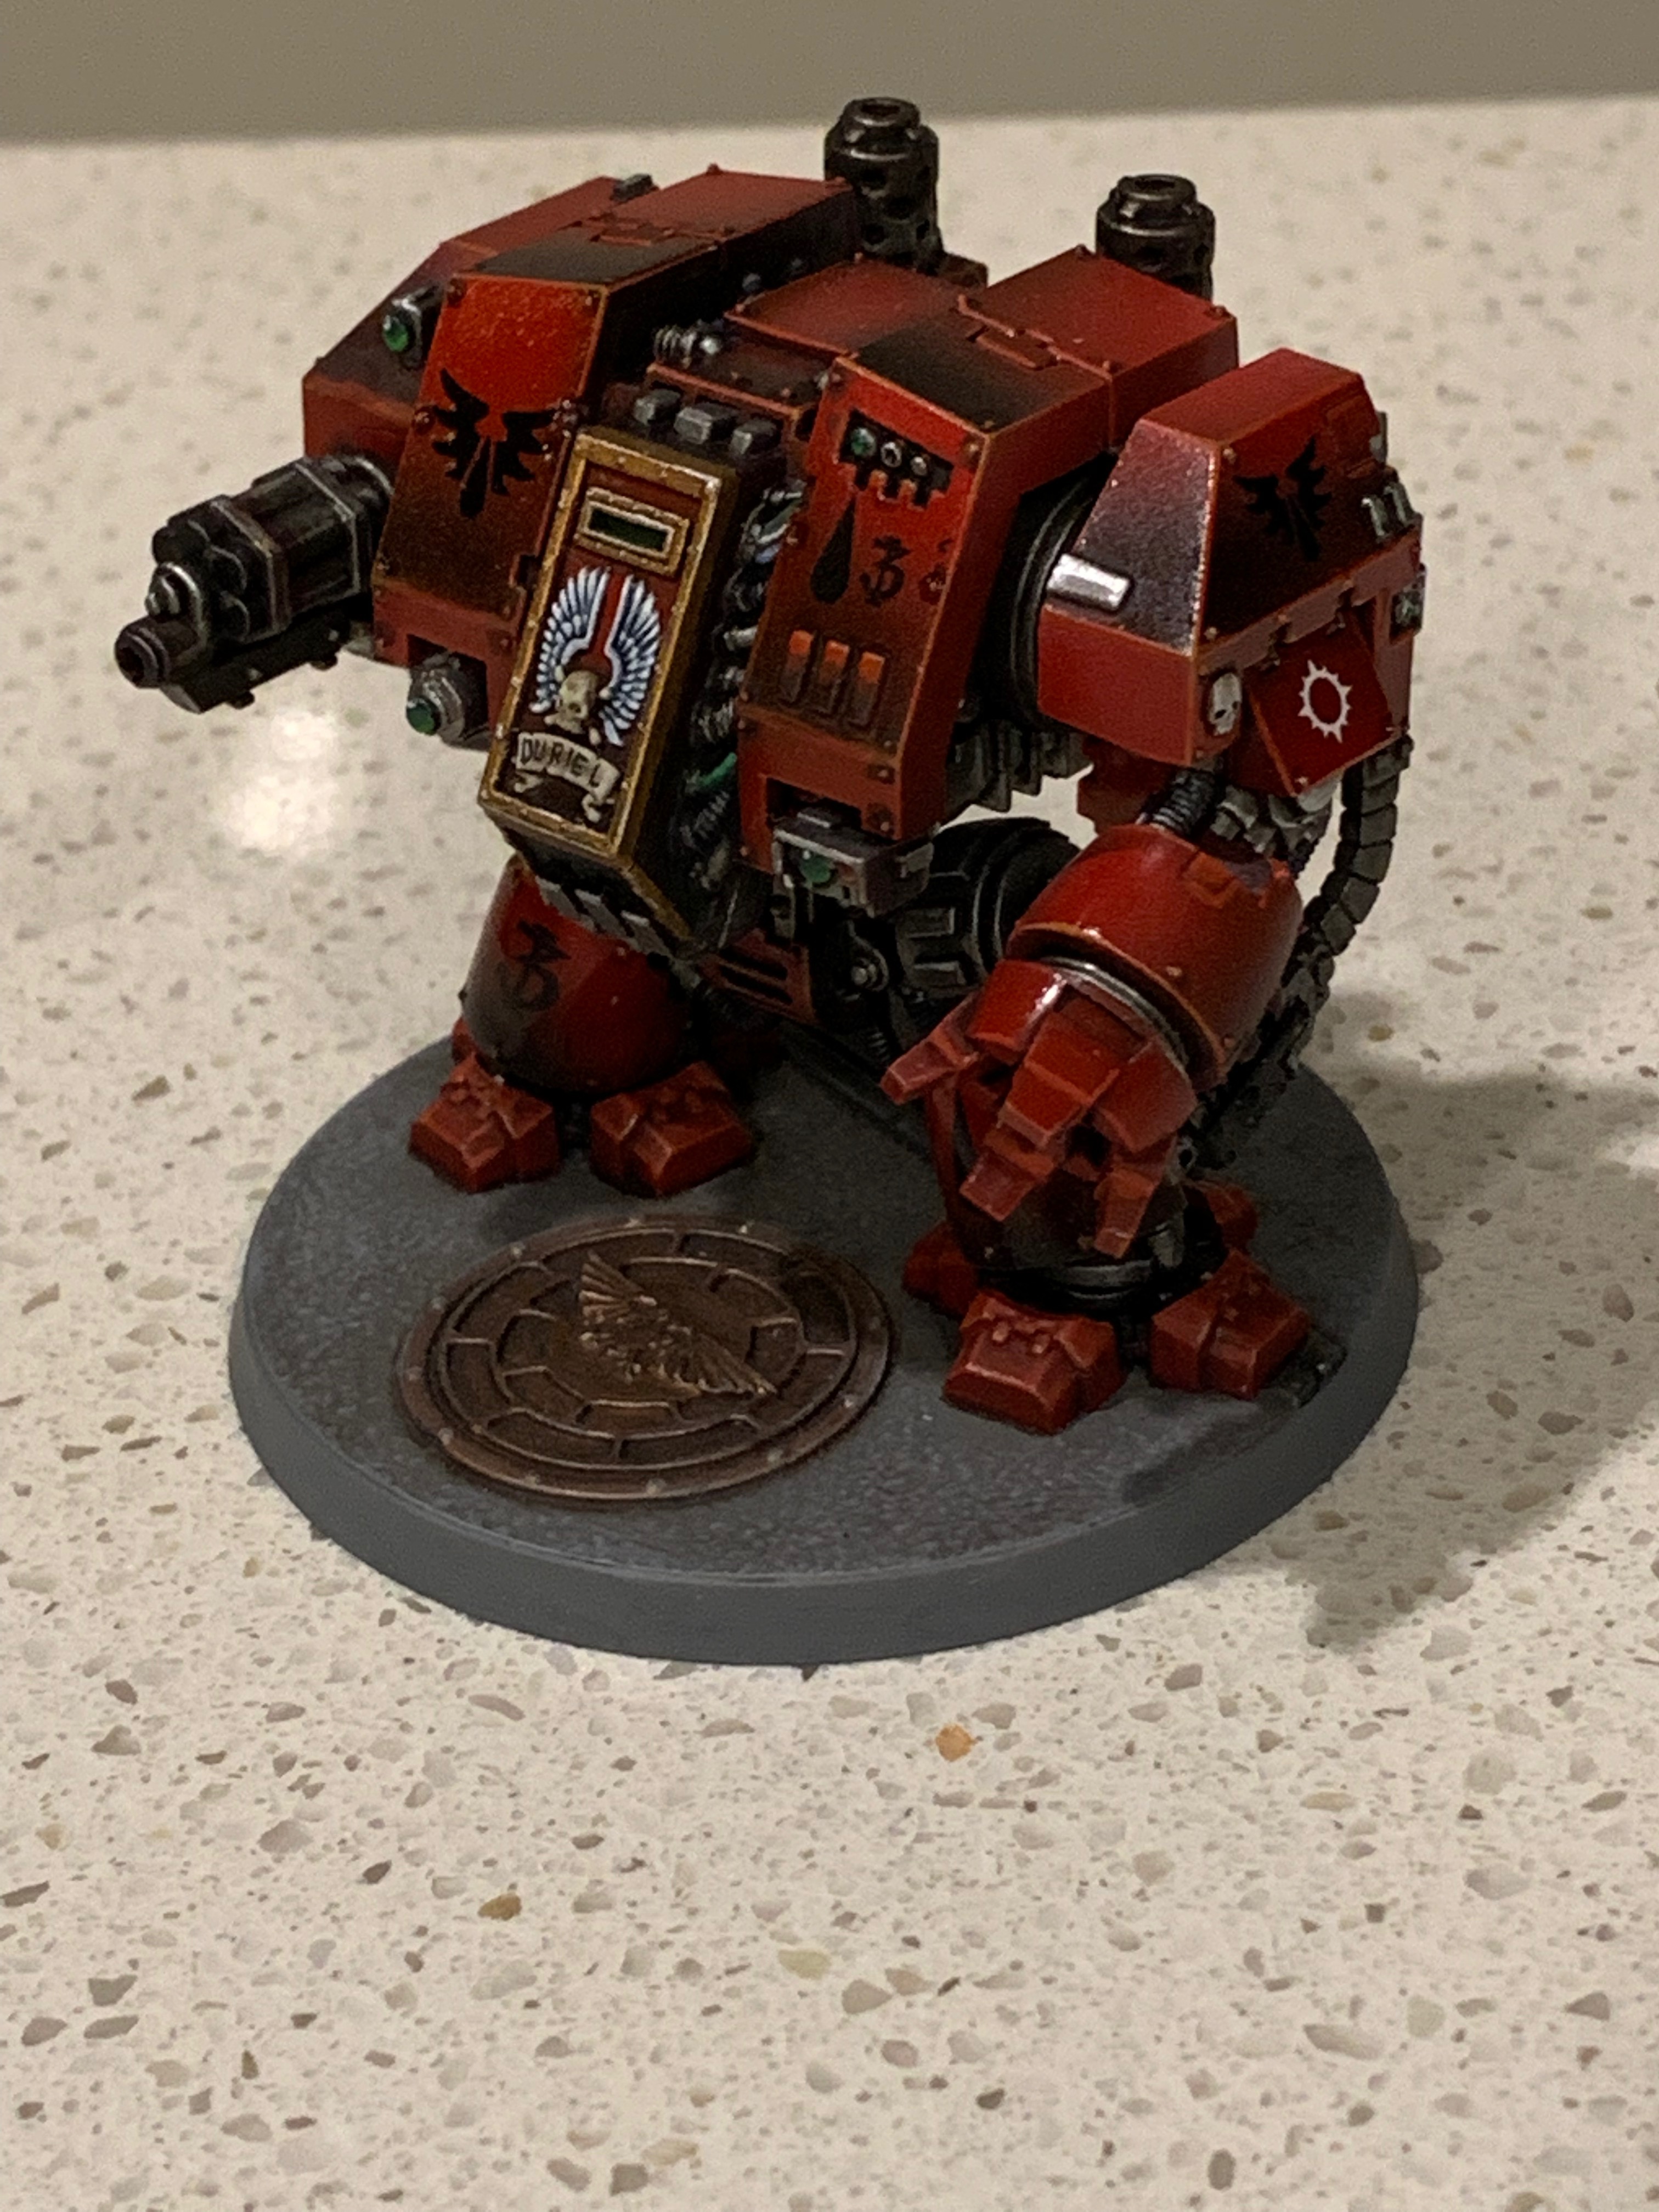
I may have been hanging out for this part for quite some time - adding company decals. The standard dreadnought body is such a nice flat area, and I printed off a special sheet of gothic numerals to add some numbers. In my mind, the DC dread is the 'old' one in the company; the furioso is next (#2) and the standard dreadnought is there for backup (#3).
Of course, I promptly stuck the wrong number on the standard dreadnought and had to slide it back off with a lot of water.
Finishing the claws into the wrist housings. I've cheated a bit and only used 3 blue claws for these - the 'thumb' is being used for the standard sets of claws.
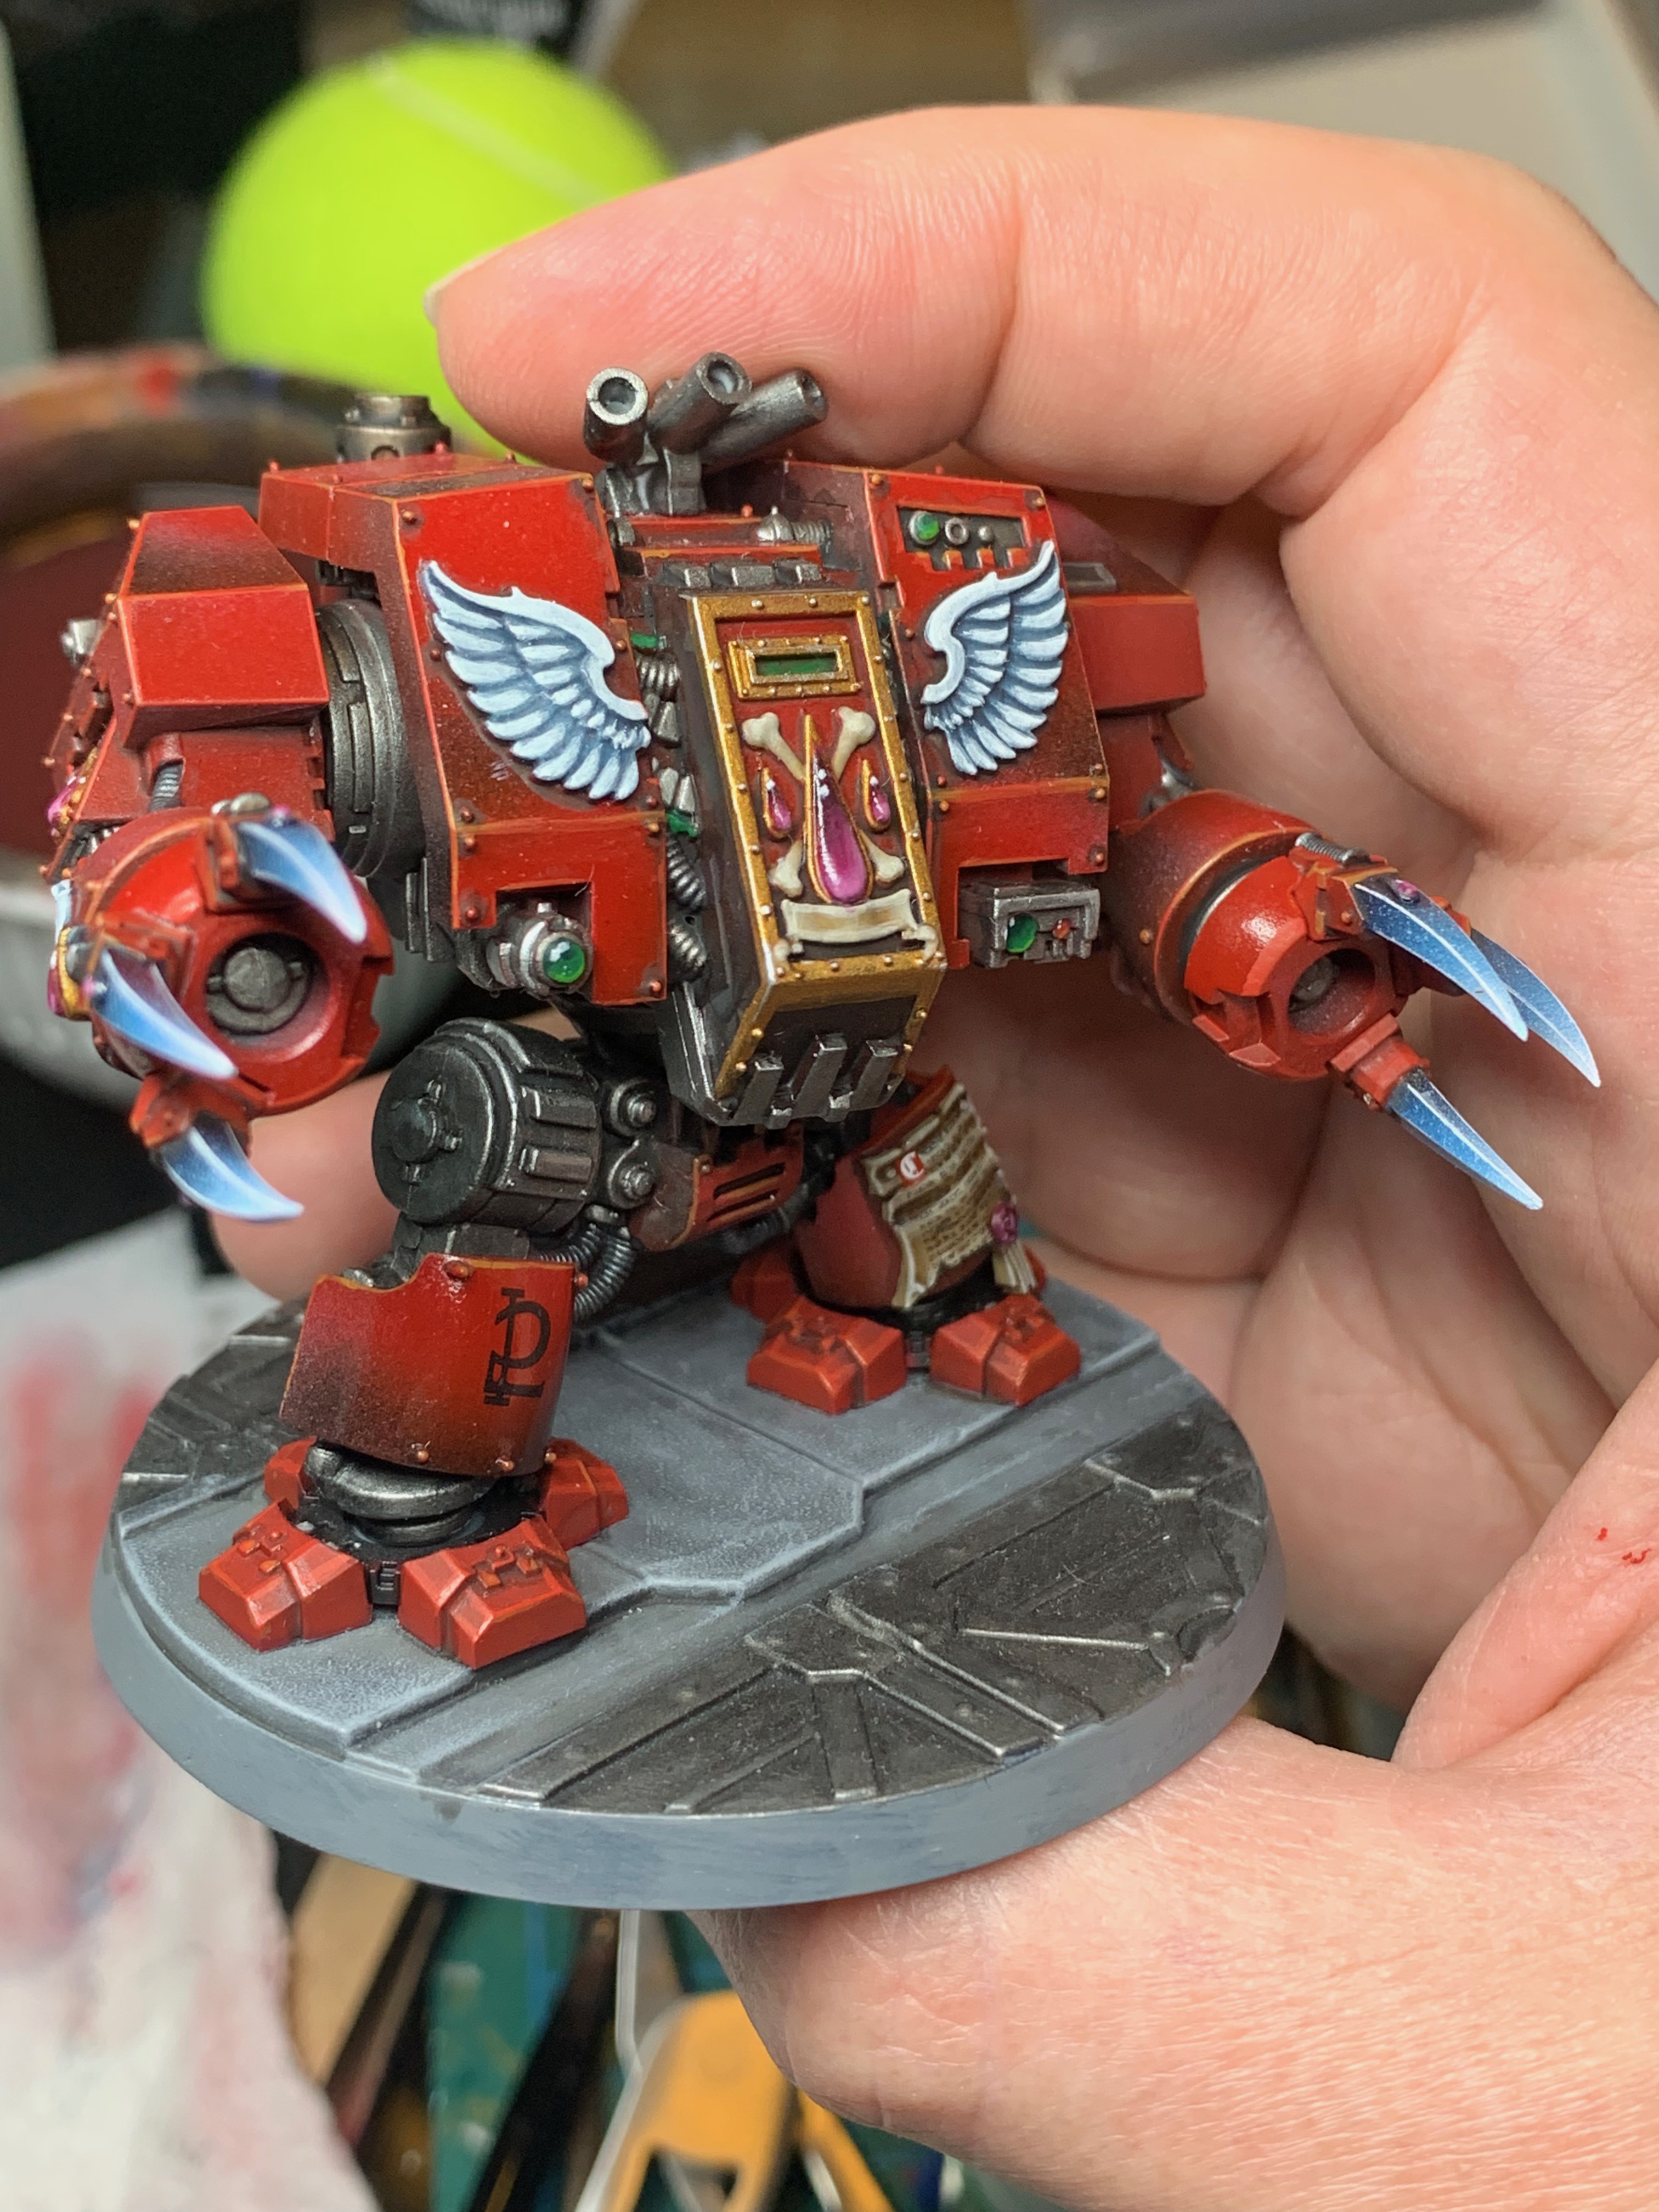
Ok - pretty happy with the look of these. The furioso is such an iconic unit and I've wanted to paint one for a long time, especially with the blue claw effects.
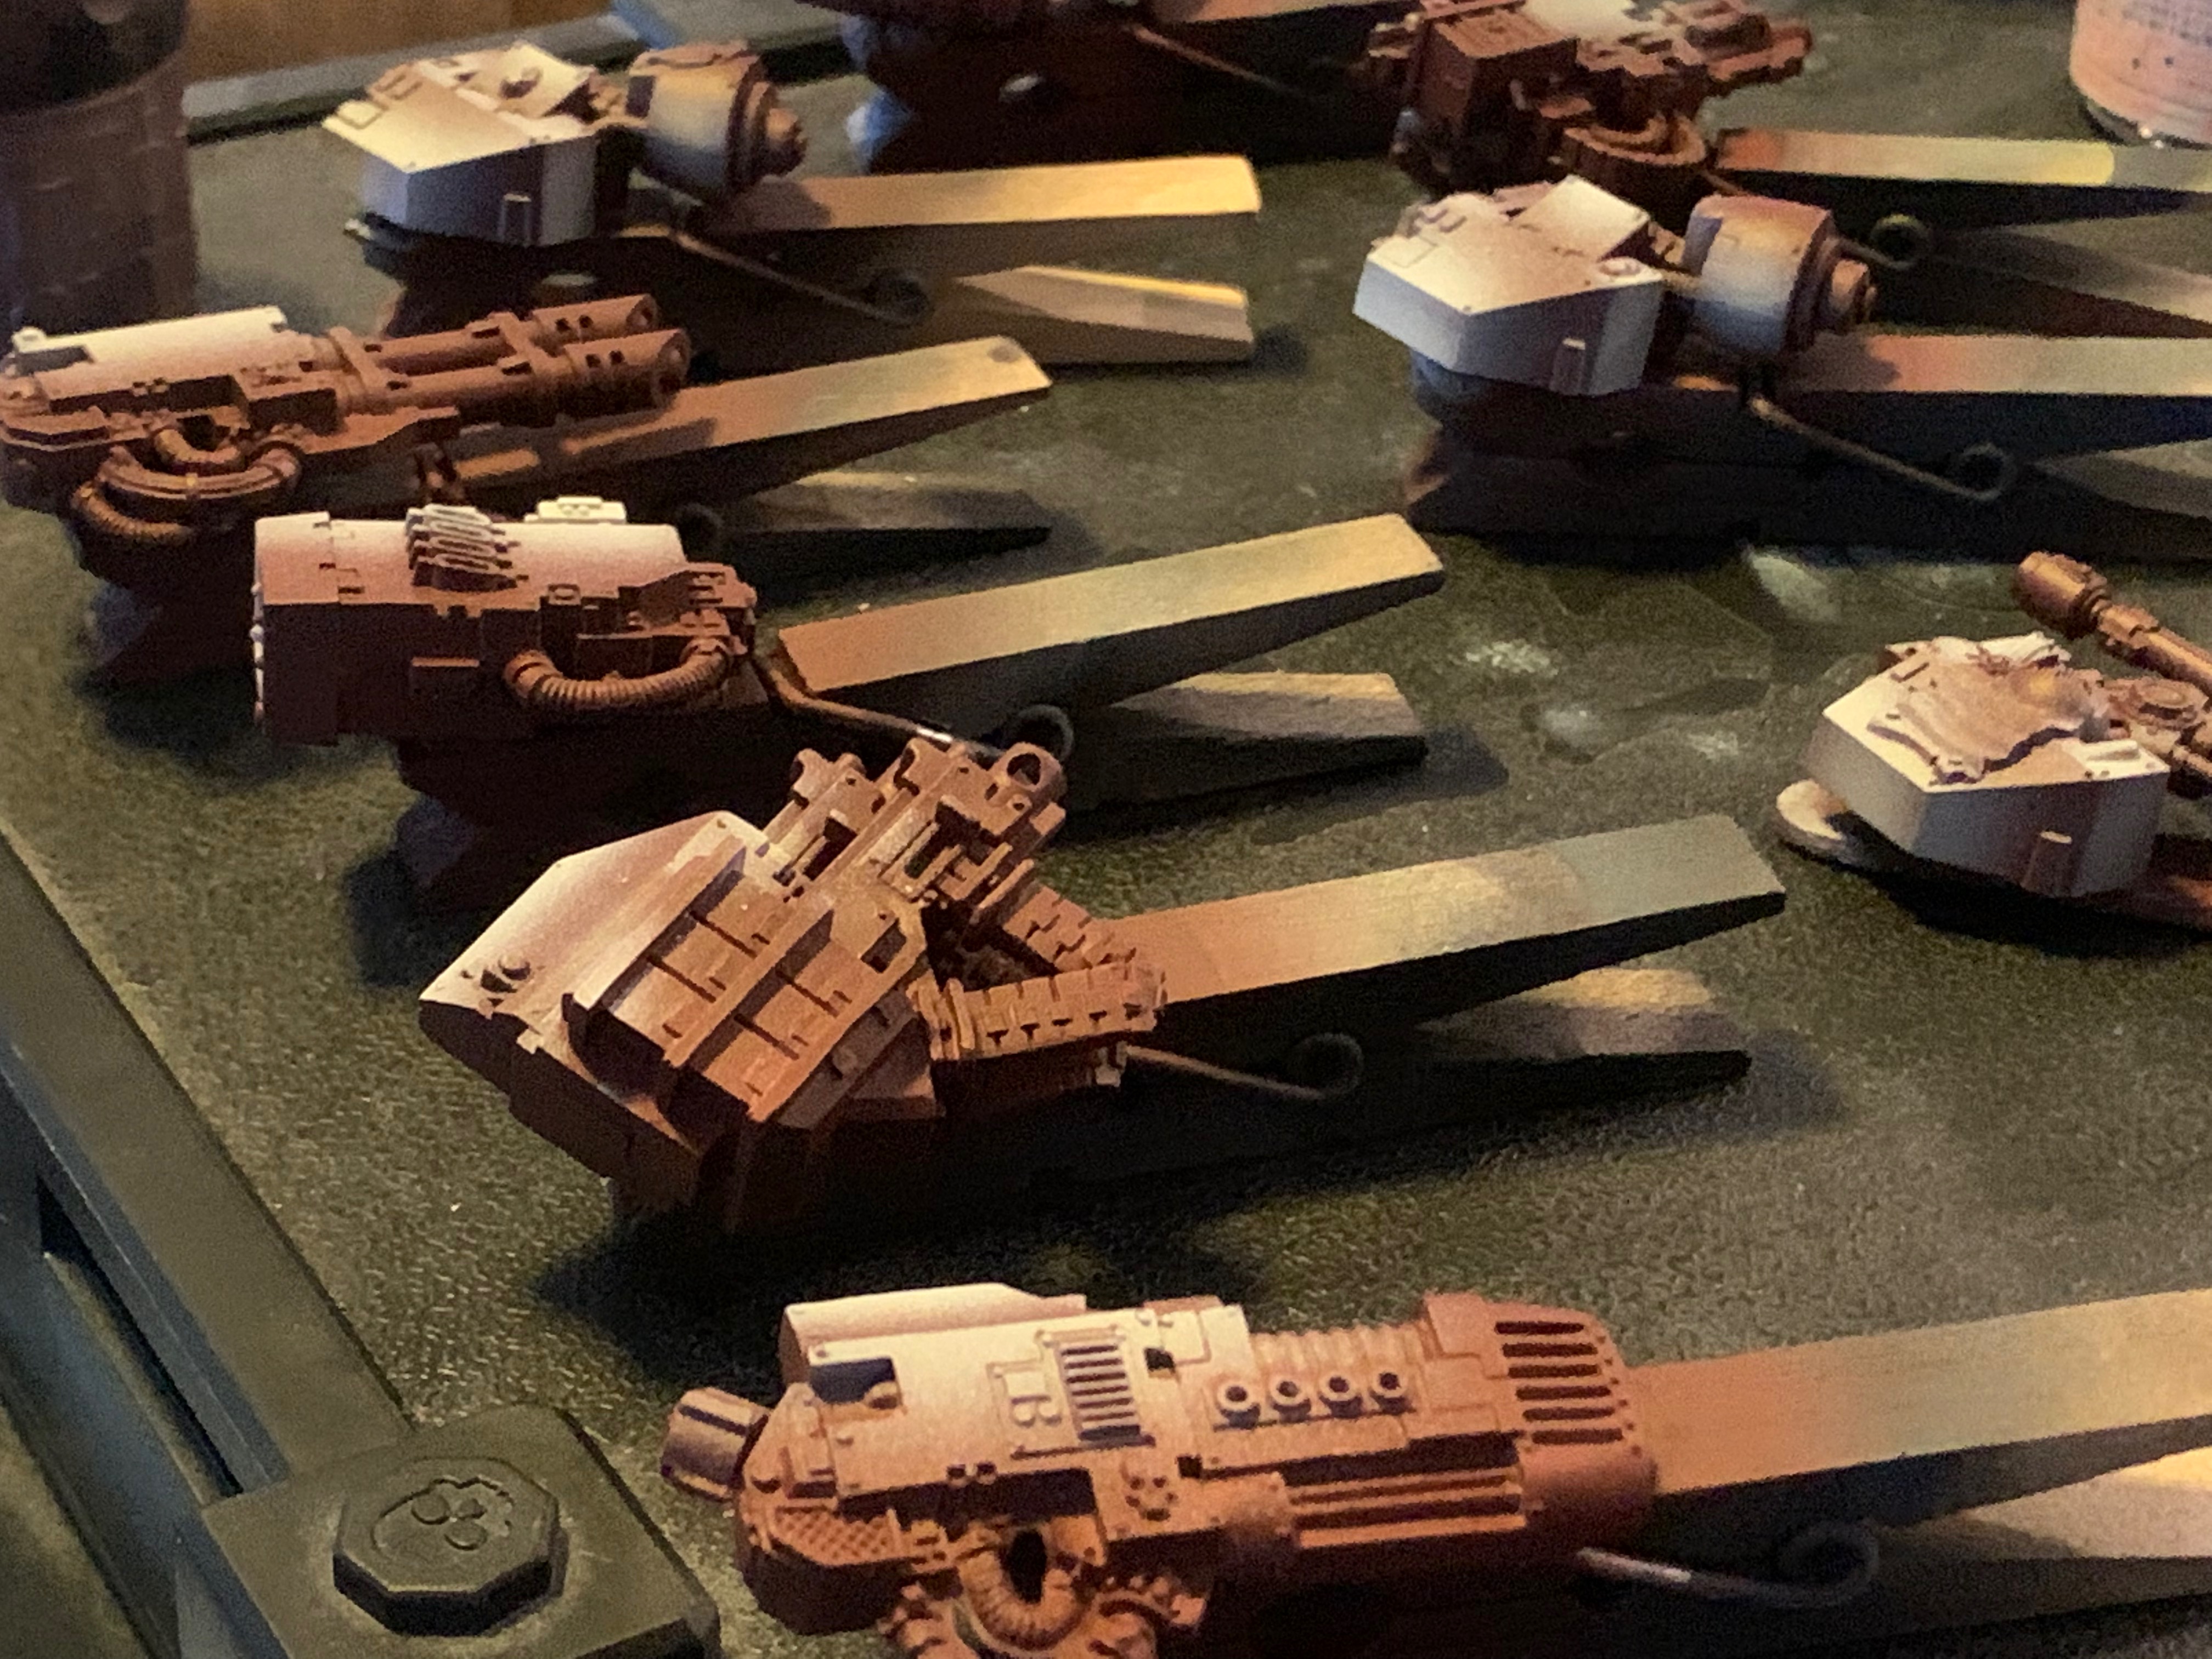
Grinding the detail on several weapons - always seems to take a little longer than planned; and for some reason I insist on doing multiple alternative options rather than a single model.
Decals going onto the arms too - mostly just the black drop for the 5th company, although there are a couple of nice big areas to sneak an extra chapter marking too.
Maybe not quite as obvious on this pic - the librarian style leg guard has been given a text transfer from Luther's site. I've been wanting to find something to use these on and looks like now is the time. I'd done some careful masking of the dome join between legs and body and it's finally time to plastic glue them together.
Ok so our kitchen bench lighting is terrible - just wanted to get some quick pics while the glue was still drying.
Plus the older sibling coming out of the cabinet.
Last couple of touches as the weapons are getting finished up - the lascannon and plasma arms got a hit with the airbrush. The plasma I'm quite happy with. The lascannon I think I went a bit overboard on.
That's it - I think I can now call it a full battle company. And in only 7 years.
Of course - is an army ever really finished?
Will have take the whole army out of the cabinet soon and post up some shots of the whole group.


No comments:
Post a Comment