Most model gamers think of the hobby in a 'build' mode and a 'paint' mode (and 'play/game' mode of course). I also think of there being an 'engineering' stage - this is distinct from just 'building' in that it covers modifying a kit so that it can be magnetised, open/closed, strengthened with pins/sprue or even just recut if grabbing parts from different kits.

I often quite like this part, as it involves thinking about how to solve something that isn't on the instructions. Often building in functionality or swap-ability it wasn't intended for.
Not all models *need* this type of engineering; some don't need any at all. But some need an extensive amount.
The marine drop pod is one of those models.
I have had one of these kits in my box of sprues for about 6 years, and must have picked up another at some point. Since everything generally looks better in threes, I got hold of a new kit (which is the same as the old kit in a new box) - which at least has some new and colour instructions.

I've generally found it to be cleaner to glue together fully sealed pieces early in the process. For things like the doors it seems better to get a solid join and then go around sanding/cleaning up the edges.

While letting all the doors set, I clipped out some of the fins to see how the kits fit together. It's... mostly good. Although I can see that there isn't a heap of clearance. Where the two little tabs come out on the side of the doors, it's worth sanding the area quite heavily (as well as the lower edge of the door itself) so there is some buffer for when paint goes on.


The central columns are relatively straightforward - although need to be well sanded to make sure they line up cleanly.


I kind of wedged these onto the drop pod bases while the glue was still a little damp - just to make sure that they are well aligned and will fit neatly later on. Unfortunately they remind me of other devices.


With most of the main parts clipped and cleaned up, I packed up a lot of plastic to take with us on a family visit. A couple of spare hours used to do some test fitting and then the more interesting part of magnetisation.

While Ron at From the Warp did an excellent guide to drop pod magnetisation here a number of years ago, I didn't like the idea of putting magnets at the bottom of the doors. Leverage & physics says that a small magnet at the top of each door should be sufficient, with the added bonus of giving a nice little click when it is being closed.
I make a little indentation int he middle of the 'square' holes. The standard 2mm GW drill bit nicely fits within the space as a pilot hole. Then 3mm bit to bite out the edges and take a 3mm x 1mm disc.


The main thing is to make sure that the magnets will sit flush or slightly below the surface - even if not 100% in contact, the magnets will hold the door closed. If the magnets are protruding above the surface, there will be a gap in the finished door no matter how well the rest of the parts are made to fit.
Repeat many times.

The doors are done in reverse - clip off the square nubbins and then drill a 3mm hole into these.
Two tips to make this go a bit easier - firstly, mark the centre point for the hole with craft knife tip before filing/sanding the remains of the nubbin flat. It's easier to guess the exact centre point when you can still see where the tab used to be vs having a 1cm flat triangle. Secondly, as there is a cavity behind the hole - I pack a little ball of old blutac into the space before adding superglue & magnet. Green stuff would be the professional solution, but blu tac is much less fuss and the main purpose is to give some resistance against the magnet while the superglue dries and stop them falling into the cavity.


Insert many magnets in the doors. I kept my stack of magnets on the engine tabs so it's easy to keep the right direction facing the right way. Double check these twice. Prising them out afterwards is next to impossible.

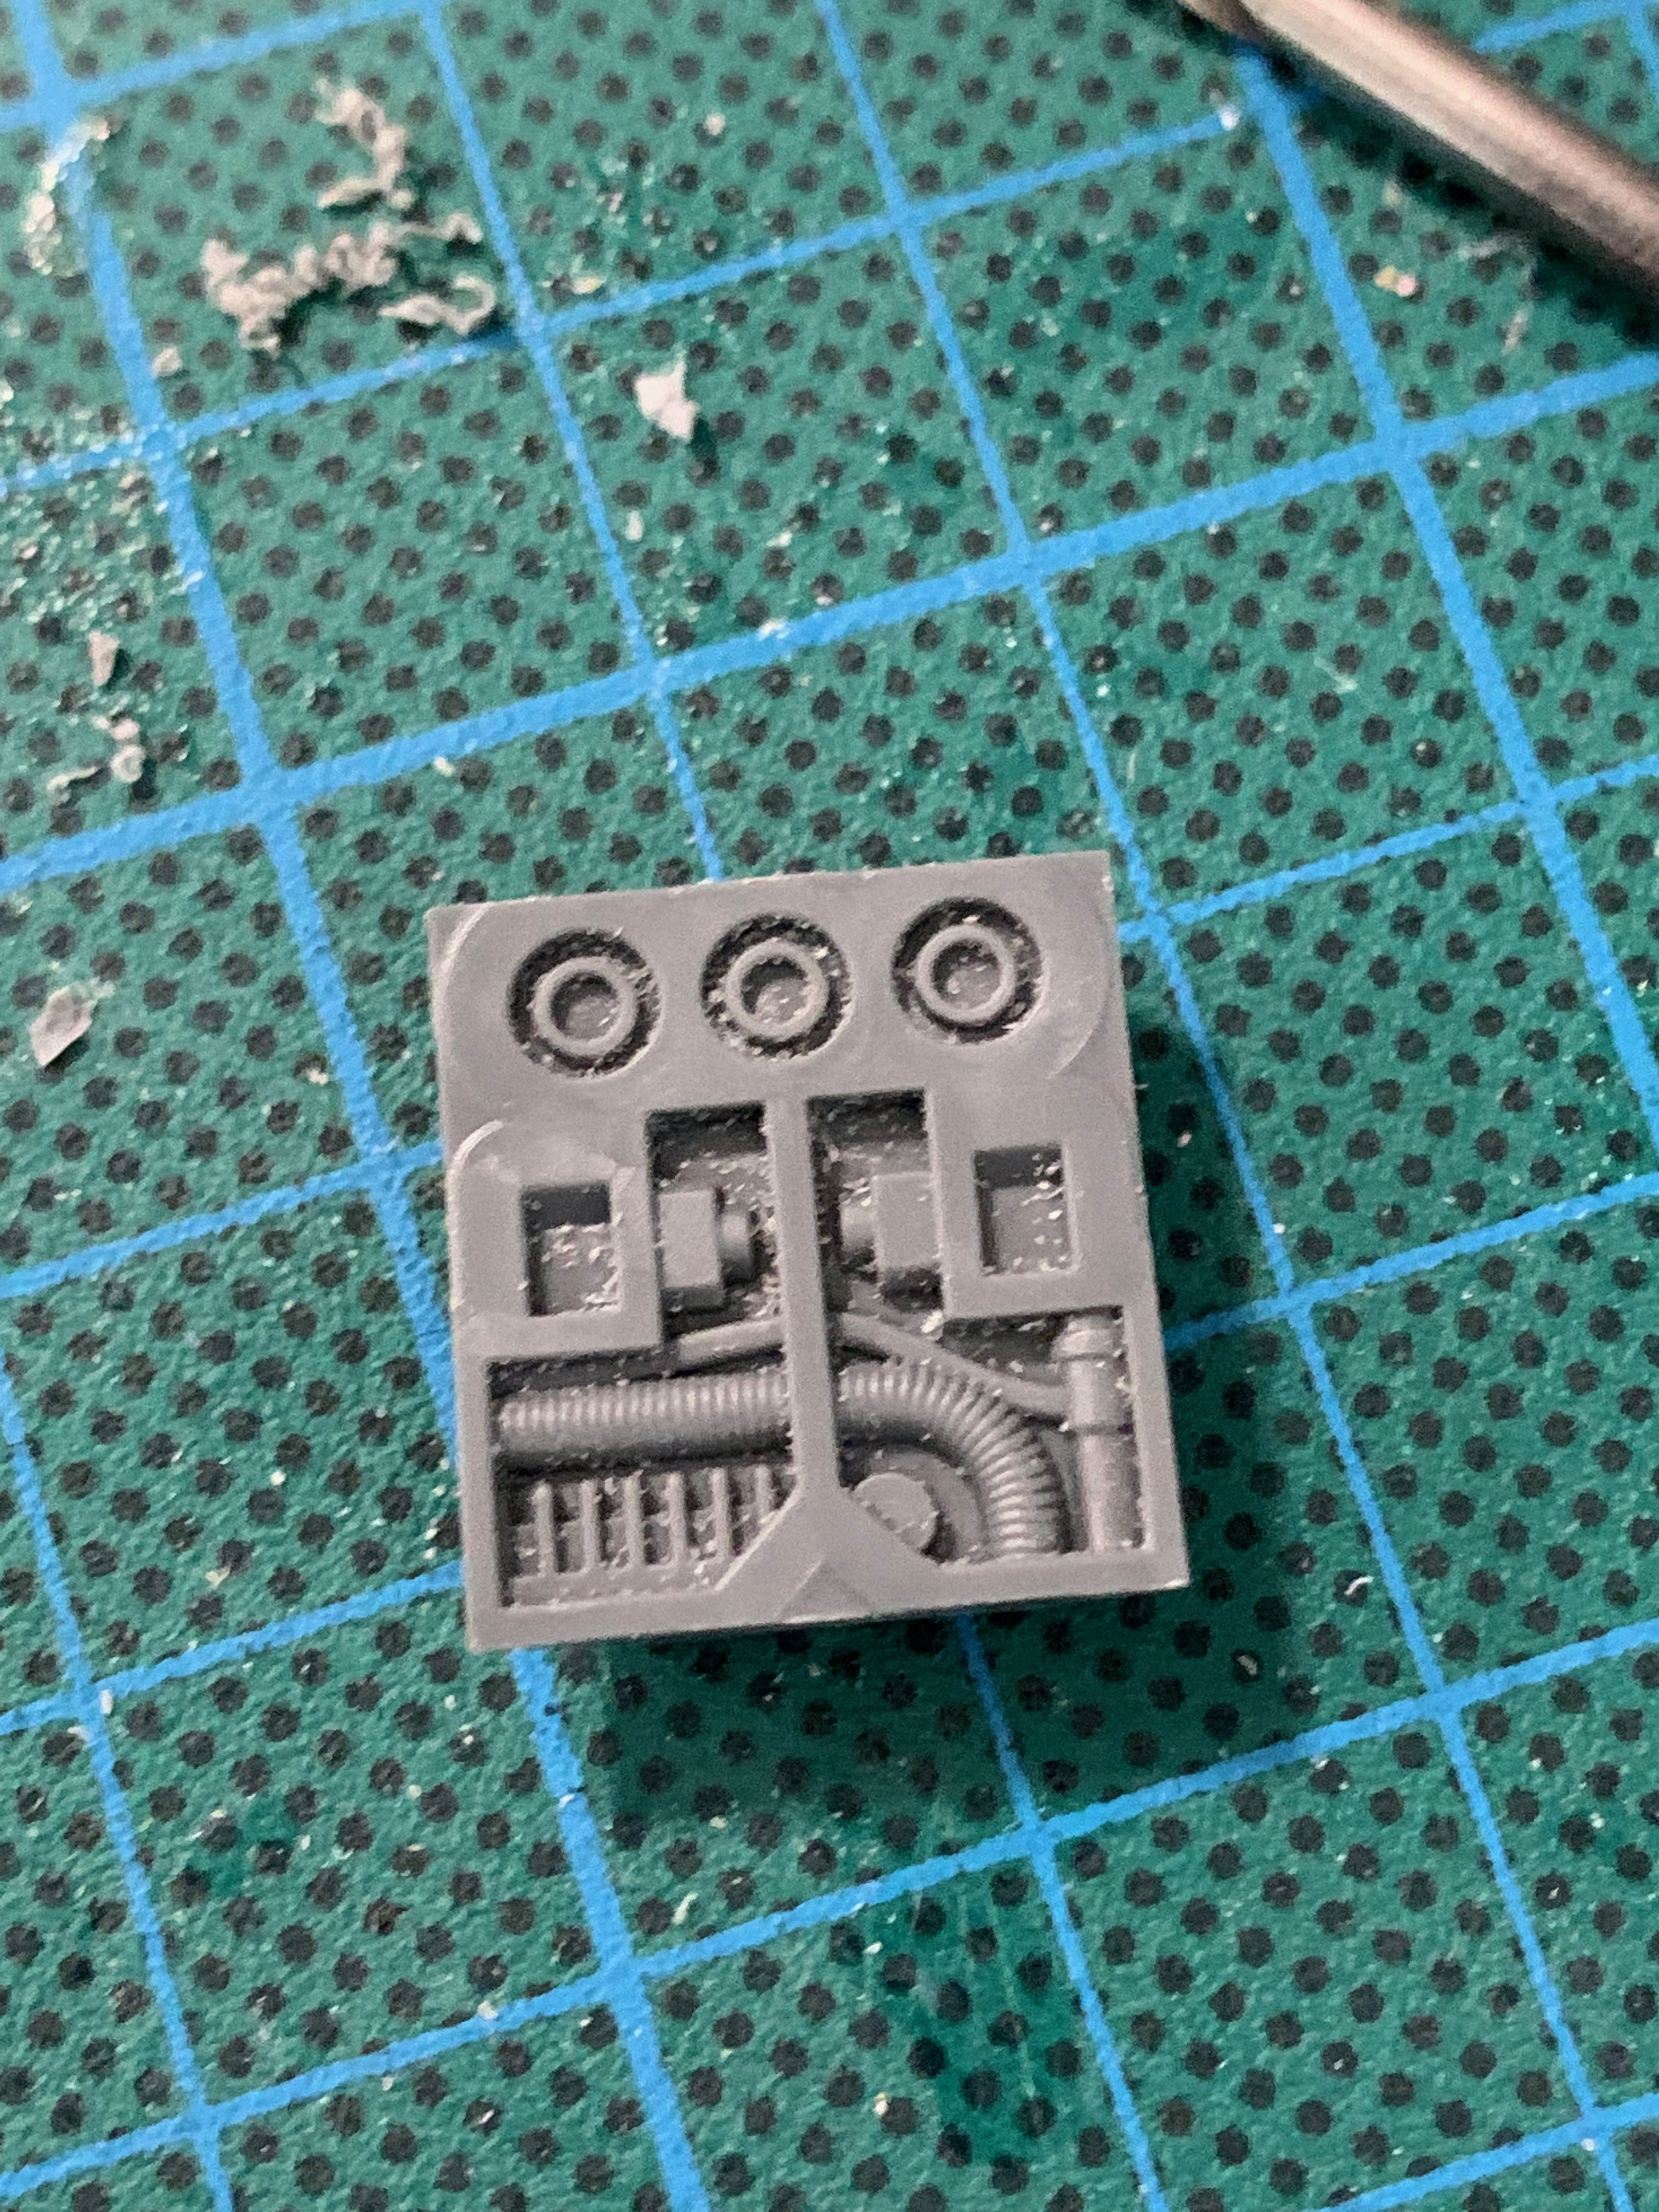
The engine plates have been glued onto the central column - the magnets in the doors are very nicely lining up. They give a nice satisfying click when being closed.

15 doors and 2 magnets on each side of the join for a total of 60 3x1mm installed. This took me a couple of hours, although after the first couple of experimental ones, the process was pretty quick to repeat.


The alignment on these actually looks really good. This was probably the main thing I had concerns about getting right during the build, and some time taken on checking magnet alignment carefully seems to have helped.

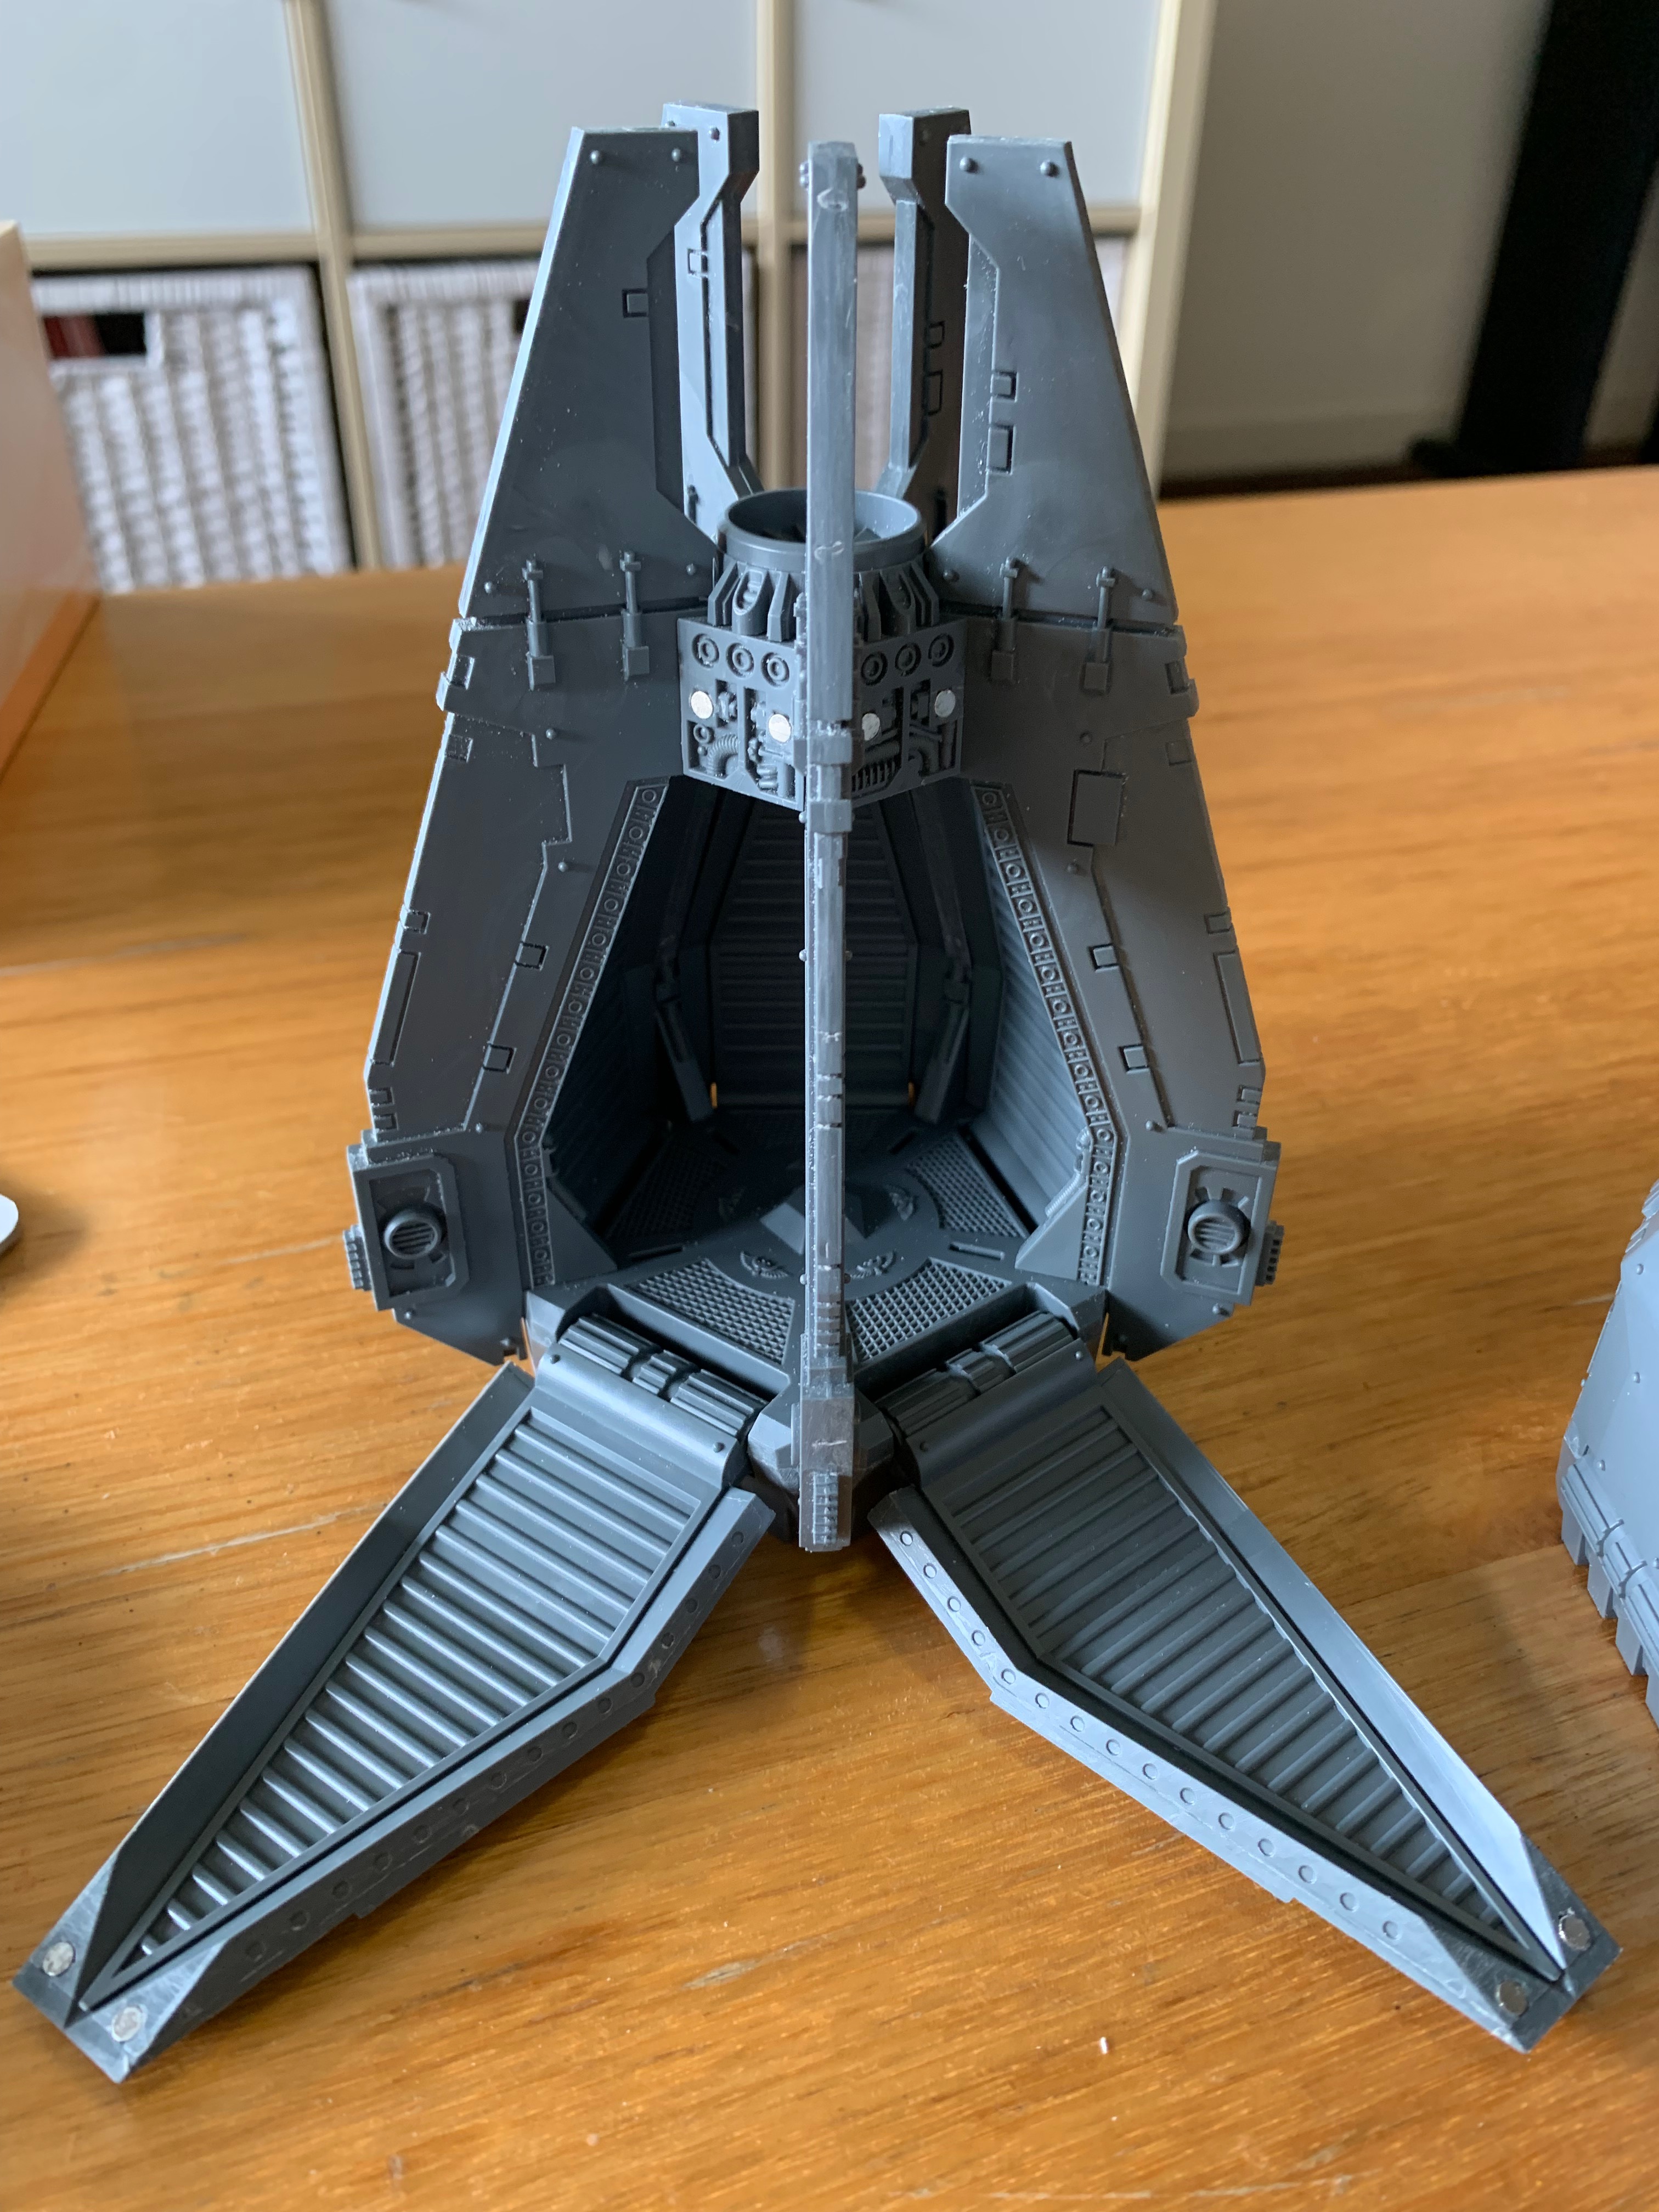
Still a heap to go on the interiors - since half the point of the magnet work was to allow the interior to be visible, the internal gubbins need cleanup.
As Ron mentioned in his post as well - it's specifically worth keeping an eye on the 'sergeant' pieces (since they aren't obvious in the instruction book). The harness with the 'round' tabs is the only one of 10 which will fit into the round hole frame.
The sergeant harness has a skull on the front, but I only noticed later on that the frame also has an extra bit of hanging cable that the 'standard' frames don't have.


Being able to spot those specific parts is handy if you make the kind of mess I did.

The last thing I wanted to rework was the mounting mechanism inside. Either missile launcher or bolters should be usable, however the parts are designed to be quite permanently installed. I clip the tabs off the mount and drill/insert a 3mm disc magnet.


The magnet is *just* a little thicker than the plastic fin, so I then had to go shave half a mm off the inside parts of the weapons before installing 2 matching magnets in the sides. It is much easier to file/cut down the plastic before the magnets go in - and safer to have more clearance rather than the two sides coming too close together and making it impossible to click the launcher around the mount.

With all the parts cleaned up, the next challenge is to work out how to paint everything. Again - Ron's early work on painting these in sub assemblies was amazing, although I deviated from his setup a little as well. The two things that I wanted to make sure were possible for mine - must use plastic glue to put the final pieces together (since superglue does bad things to 'internal' parts when the vapour dries out), and I wanted to be able to do all the red parts with an airbrush to get some strong highlights.
The first aim means some foresight - which pieces need to be masked off so that they are kept paint free and will work with plastic glue later on. The 5 fins around the outside make contact with the base and the engine - so the fins need masking in 2 places.

I then pushed a strip of tamiya tape into the recesses of the engine, careful to keep these neat. The glue doesn't need to be a perfect coverage on all sides, so a little paint won't kill the process. However, it's more important that visible areas aren't accidentally masked off.

Overmasking (? if that is a thing) was more of a thing on the base - I was careful to keep strips of tape slightly smaller than the contact area. That way there won't be any visible gaps in the metal paint once the parts are assembled.

Test fitting going well - a few of the fins took a bit of effort to wiggle into place; but the doors fit neatly closed without big gaps so I'm pretty happy with the outcome.

The last details to prep for painting are the icons. The kit only gives you enough to do 4 doors with the chapter icon, plus an aquilla for the sergeant.


Then everything is ready and tucked away. I'll spend an extended painting session with the airbrush once I can get a clear few hours to set up and crank through some steps in one go. Considering how many sprues went into the parts for these, it's a little amazing how little total plastic is involved.
No comments:
Post a Comment