Follow up post finishing off Mephiston - it's really quite a nice model and surprisingly less fiddly to get into details than several other BA characters. Strap in though. I took lots of photos of each detail as I'm not likely to paint another Mephiston until he gets a 3rd model in 25 more years.

I'd left off the last post with the airbrushing done, and the black cloak having had a basecoat added. In the shot below, he has had an agrax earthshade added to the red parts, followed by a slightly thinned carroburg crimson just to the skirts (still drying in places). The leather areas have been basecoated with a couple of layers of panzer aces new wood. It's what I often use for edge highlighting red armour, so carries over the rest of the army - it will be heavily darkened though shortly.


Skirts now fully dried, and ready for some extra highlights. The wet palette in the background shows the scars of having worked through gemstones on 40 eldar guardians.

The leather has had a 50:50 mix of agrax earthshade and black templar contast added. I wanted something darker than a wash alone, but still kept mostly brown. This seems to have come out with a really good middle ground and largely reducing the need for lots of highlighting.

The reds have had a couple of additional highlights added to this point and I was really keen to jump in and add some details that had appealed about the new sculpt. The box art includes the edging and blood drops on the skirt from the 1997 Mephiston artwork and I was definitely going to have a go at adding it.
To start with, I mark the high points of the folds with abaddon black (air), going over the lines faintly 2-3 times to build up the colour. I find it's easier to mark these at the same height and join these together than to try and do a single line in one go.

I then extend these as much as possible to join up the sketched areas, slightly thickening to smooth out any little wiggles. There is basically no way to even out the red if a mistake is made so the only real option is to go a little thicker with the black.

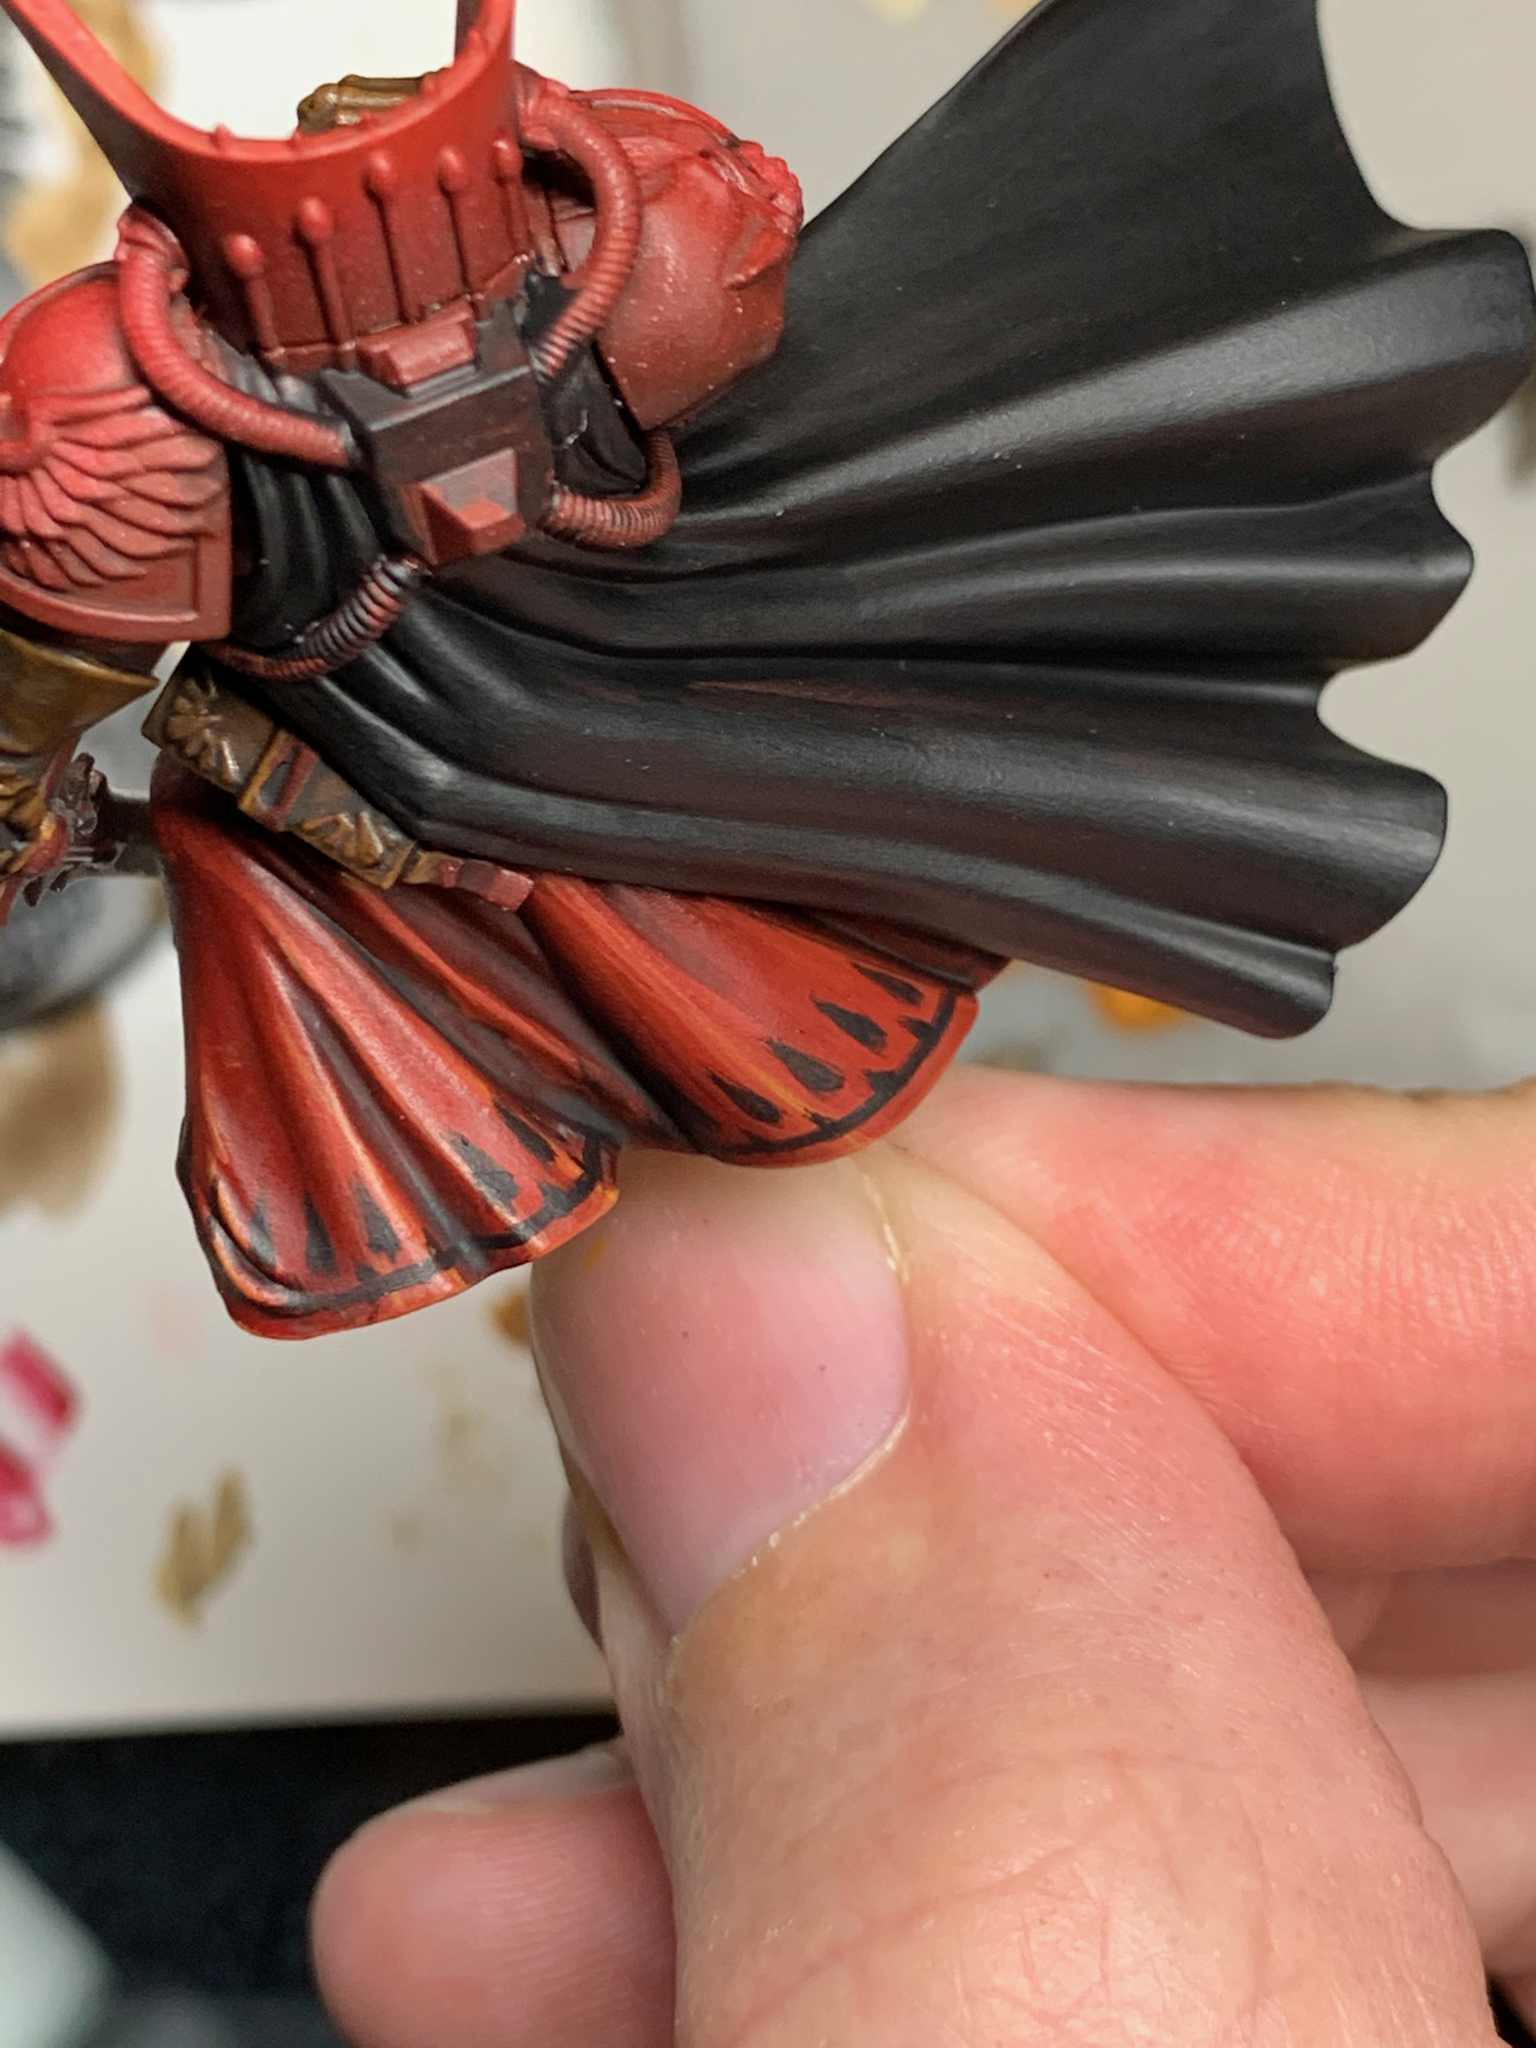
The line extended around the back as well. For a couple of the folds where it's next to impossible to get a brush into the depths - it's usually better to stop and just let the darker area imply that the line goes all the way around.

I then went back and did all the drops (working downwards on the skirt), adding a little black thorn on the line in between each drop. The drops aren't super smooth, but the effect from normal viewing distance is quite striking and matches the artwork fairly well.

Swinging back to basing next, as I want to be able to stick the rest of the model down and use this to hold it for the rest of painting. I had basecoated the foot red and then drybrushed the rest with dawnstone/administratum grey. Once the skulls are painted in zandri dust and washed with agrax, the whole lot gets a screaming skull drybrush to give it all an off white/dusty look.

While at it, zandri dust has been added for the hair and carefully washed with seraphim sepia to add a little darkness. The face has had bugmans glow and cadian flesh added, followed by a thin wash of carroburg & druchii violet. This gives a very slightly blued colour vs reikland fleshshade which fits a librarian a little better.

The other areas getting some zandri dust were the bone details - backpack, top of the aegis hood and a few skull ornamentations around the armour. This includes the really big skull design on the right shoulder.


The face has had some kislev flesh added to give him a more pale skin tone, and the teeth and eyes have been painted white. Nuln oil or black templar in the mouth add some depth.


I was probably getting a little less patient at this stage and rushed the power effect areas a little - if I was going to do another one, I would definitely take a break before starting those details and come back fresh with a steadier hand.
Kantor blue is thinned down and washed (about that consistency) over a slightly broader area. That is followed by teclis blue, ice blue and then a tiny hint of white scar. For most of the smaller areas, at least one of the mid blues could probably be skipped. If I still had one handy, a gulliman blue ink wash to darken the recesses again may be a good idea.

I think I fumbled the lightning on the sword a bit - but at this point I kind of need to press on rather than go back to base metals, black washes and build everything up again.


Few things to tidy up on the base - the foot has been highlighted back over the drybrushing so it's a proper red armour again, then a good dose of blood for the blood god into the chapter marking and surrounds.

I put a little extra into the eye sockets on the open skull because... it seems a bit more serious that way. Sadly most of the detail on the stone panel will be hidden under the model itself.


A couple of very small final highlights on the backpack and that part is now done.


With the blue effects carried over onto the head as well - this is a quick check with the head just resting in the final position. As always - with hindsight half the details inside the hood end up being hidden and could just about have been skipped. Conversely, it's almost impossible to get in with a brush to even paint the red so my preference is still to do these separately.


Swinging back now to do the white wings on the shoulder and belt. In the first pic, only the right side has been highlighted with pallid wych flesh. Individual feathers are fiddly to paint but worth taking a little extra effort.


There aren't many details left on the model itself now - next are the vials/syringes on the belt, which have been basecoated black over leadbelcher. These have been painted khorne red, mephiston red, troll slayer orange, then a very, very soft/thin line with pallid wych flesh to simulate reflection on the glass.
I had to look at the box art a couple of times to realise how they had done the contents. Usually liquids will have the water line painted horizontally to reflect (normal) gravity. In the case of mephiston, the vials are swinging up and to the left, so the fluid line simulates the liquids sloshing sideways with centripetal force. It's a nice little effect that gives an extra sense of dynamic movement to go with the flow of the clothing.


Most of my marines have purple/amethyst gemstones to give some contrast to the red armour - but I felt Mephiston really should embody blood in all places. His stones have been done in red. The stones have been carefully painted black first, with khorne red for the bottom ~70%. Then ~30% mephiston red and a thin line of troll slayer orange.


The other freehand detail I was both dreading and looking forward to is the lining of the cloak. I don't have any photos of highlighting the black folds of the fabric, but it was done with a layer of very thin eshin grey, then some watered down dawnstone applied to higher areas. A wash of nuln oil to darken everything, then a final thin line with dawnstone. This last stage of grey was also done with some flicking motions - partly as an accident but it helps give a slightly more fabric texture to the black.
Then starting in on the markings. This is slightly thinned averland sunset - it's a base paint, so the coverage will be better than a layer paint, then with enough water to make it almost like ink from a pen. Resting the tip against the top of the drops first, then rounding the bottom second.

I ended up getting quite a nice big load of yellow on my brush while mixing the water in to do the lines, so virtually ended up painting the whole line around in one go (and missing some progress photos). Similar to the skirt, it was started with a few faint separate lines on the high points then going back and filling in the deeper folds of the cloak to join up the lines, thickening the line where needed to smooth out any wiggles.
If I was doing this again, I probably wouldn't have highlighted the black first - being able to tidy up any smudges of the yellow with a pure black would have been helpful. Then applying a dawnstone highlight over both the black and yellow would have been cleaner.


And... that's pretty much all the details done - final assembly of the 4 parts after a couple of pictures of the bits.


Main model glued onto the base...


Head finally sealed into place.


Backpack on as the last detail.


I should take a couple of SLR photos in the white booth too - for the moment he will sit with my terminators.

Really enjoyed doing this one. Pushed a few new techniques that I hadn't tried before with the markings on the cloth as well as the blue glow effects. The model design itself is great - the newer CAD plastic models have all sorts of clever dynamic poses that are only possible by slicing up a 3D render, and this one really captures lots of movement.
I think the next set of blood angels to hit the bench will be the final tactical & assault marines to flesh out the full 100 man company. Next up on the blog though will be a quick wrap up on what was painted during 2020.
No comments:
Post a Comment