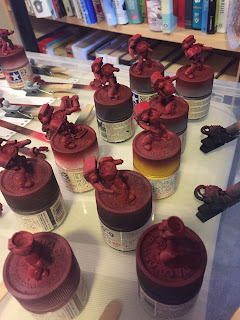
These suckers got their basecoat a couple of months ago as they are now nearing completion, it's worth catching up on some posts...
Sector Imperialis Bases
This is the first squad that will get a set of the GW scenic bases (the sector imperialis ones) that came out last year. I'm a little in two minds about them so far - firstly, they aren't particularly sharp castings (a few reviews have noted that these are made in China and can be a bit less defined than other GW kits), and in a box of 60 bases, the ~8 or so designs double up quickly.
On the plus side, compared to scratch building (cutting out bits of debris and sprue the way I have done bases before), clipping these from the sprue and sanding the edges is ridiculously quick, and (specifically for the devastators) the thicker plastic is super easy to set up paperclip wire as pins for the legs.
In the photo (since I put together bases for both squads at the same time), the 10 assault bases probably took 3x as long to lay out, glue and then add a paste of PVA and ground coffee to the traditional black bases. They are probably more unique and give a bit more vertical depth; but I'm also getting off a little easier with the pinning as almost all of the assault marines stand on one leg (single pin) so the placement isn't as critical as for the 2-pin devastators (literally more wiggle room for the assault marines).
These have been given a coat of Vallejo black primer, followed by a solid spray of dawnstone (air) to bring them up to the basic grey that the army will be standing on (city/rubble).
While at it, my first few Tablewar display boards have been given a coat of primer & dawnstone (over a black enamel spray to coat the tin sheet base). I missed getting a shot of the rubble stuck onto it before painting - ground coffee with a mix of plasticard, sprue and GW debris parts stuck on. The board at the top also has a little pile of popped out MDF terrain bits that look like bricks. Each of the panels can be popped out of the display individually.
Squad Basecoats
I seem to stockpile minis then do a bunch in a go...
Laying out 10 devs, 10 assault (with 10 jump packs and 10 standard), 3 sergeant banners, separate dev weapons for painting, plus 20 heads (since none of these will be red for once...) gives a lot of pieces.
Buried in the middle are also 3 of the marine 'casualty' minis that I have had lying around for a while. These were a bit more of an impulse buy a while ago - the GW Australia site had them out of stock for about a year and grabbed a set when ordering a box of Death company. Not sure if they will be objectives or casualties - if objectives, then I should make them a different company... 5th Co. coming to the rescue :-)
Slightly higher detail pic for the devs pre-airbrush; unlike the squads I have worked on so far, these are being done as 2x 5 man squads with sergeants from the outset. My other squads had been set up as if they can roll as 5 man combat squads (with a designated 2nd in charge / corporal), but for 8x heavy weapons, these are separate. If I fill these out to 10 man devs, I'm effectively adding an extra tactical squad with blue helmets... which can come as additional troops after building out the core tac squads.
Mass production airbrushing: as with the tac squads, this is a coat of vallejo german red primer, a dusting of light grey primer from the top down and then a thinned coat of mephiston red air. This gives some shading but nothing like the awesome contrast that Luther (The Mighty Brush) manages to get using a red tint only over the top - the mephiston coat flattens the pre shade more than I'd like, but I'm sticking with the scheme now.
The heavy weapons have been given a blast of black as well - these will need a lot more finishing by hand later on, but the weapons (plasmas especially) are big enough to get a head start with the airbrush.
Last bit for the session was to get some base / colouring on the sergeant banners. 2x for the dev sergeants, plus 1x for the 10 man assault squad.
Still plenty to go on both squads, but it's amazing what a jump the basecoat makes from grey plastic. Everything else is just adding detail :-)


No comments:
Post a Comment